Watch these videos to learn what some of the main parts of codes you made do.
Reading Resistors
Before we can continue, we should learn how to read resistors. This is because once you take your resistor off your sheet, you won't know its resistance anymore. The example below 4 lines. One Yellow, Purple, Orange, and Gold. Follow the lines to read it.
For the first line, yellow means the first digit is 4, the second digit purple means 7, the third line is the multiplier and orange is times x1000 and the gold at the end is the error (or tolerance) at 5%. That 5% means the resistor can be + or -
This means that the resistor is: 47000 +-5%
We will do this one together as a class and after that, we will take a random one out of your kit and try it with a teacher. See if you can figure it out?
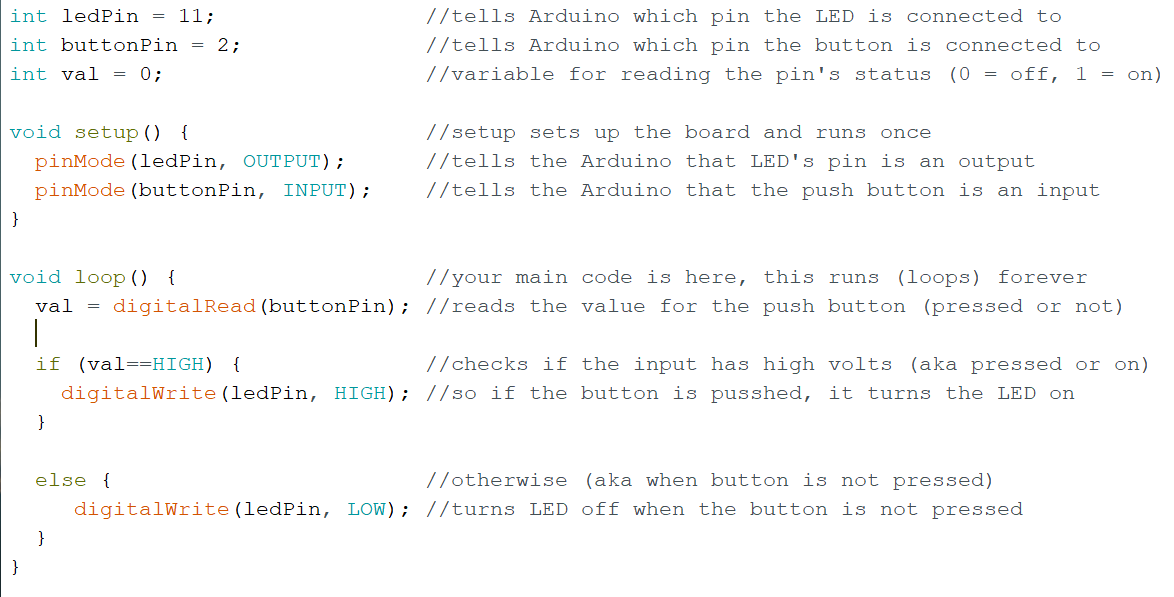
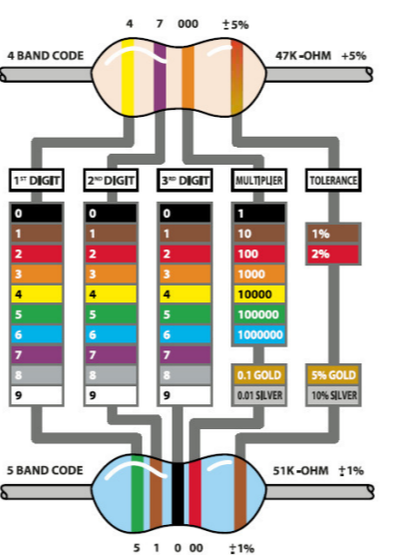
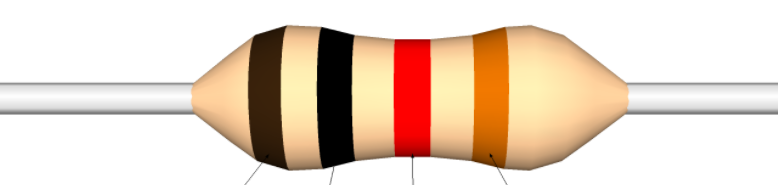
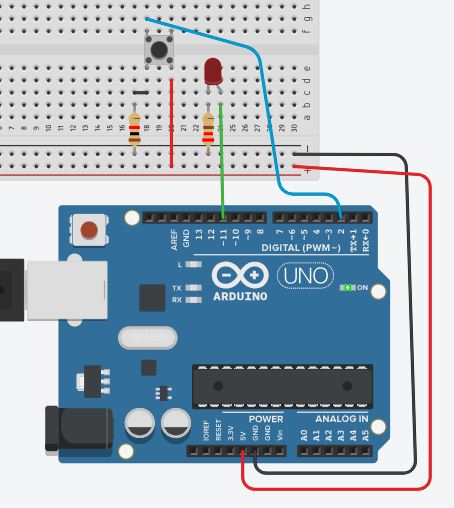
(Make sure to use the 220 Ohm resistor with the LED and the 10 kOhm with the button)
Here we are adding new types of statements to your code. Before we had just the loop, now we add if and else. Every green part of your code needs an open and closing { } to run. The curly brackets are like sandwiches for your statements. Make sure each has them.
Watch this video to learn about the code and common mistakes.
Write a code similar to below and upload it to your board to see if it works. Remember, words after // are just comments. These are not needed for it to work.
After uploading your code to your board and that works, there are two common issues.
Common Mistakes 1) My light is not turning on, try flipping the LED over, remember one side is + and the other side of it is -.
Common Mistake 2) My light is doing the opposite of what it is supposed to. If so, switch the leads connecting to the button.
For any other issues, ask your teacher for help and show them what is going on.
Once you get the one LED code to work, try to figure out how to get more lights to work with buttons if you have time using the series and parallel lesson from the end of day 1.